Finished photos of my Upton Party Dress

Finished photos of my Upton Party Dress

0755-copy

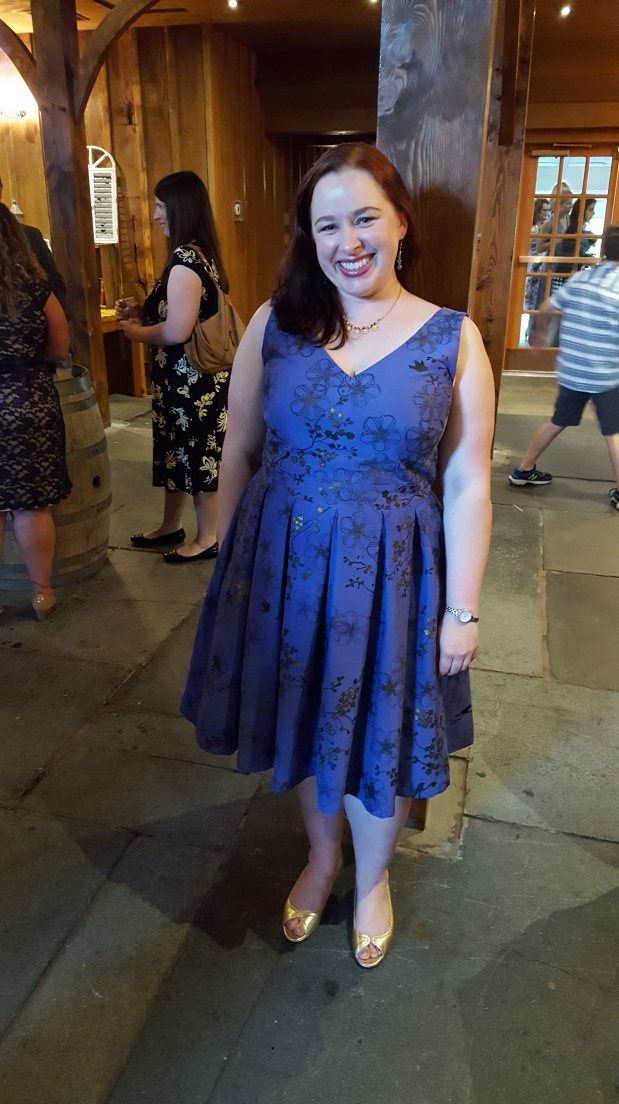
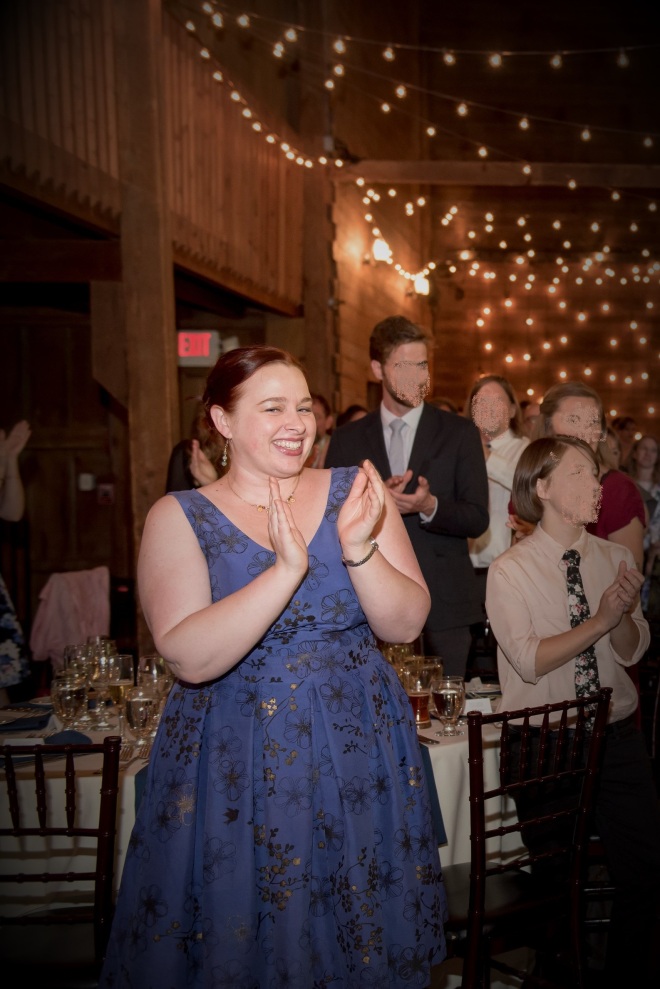
My Night Blooming Garden Upton dress worn both on my birthday and at my friend’s wedding. I love how it turned out, and I’m going to be making more! Hand-dyed and -painted silk shantung, lined in cotton lawn. (pay no attention to those faceless people behind me) Photo by Kelsey Christian.

Wow,  it’s been way too long between finishing this dress and posting final photos of it. Crazy pants! Well, there was a wedding (to which I wore the dress), and it got all sweaty from the ALL NIGHT DANCING!–and then it had to be washed (yes I wash silk), and then packed for a move, and I figured why press it when it was just going to be stuffed into a Spacebag? So it didn’t get pressed until a few days ago, and then I had to wait a few days to put it on and get photos. I am nothing if not a procrastinator.


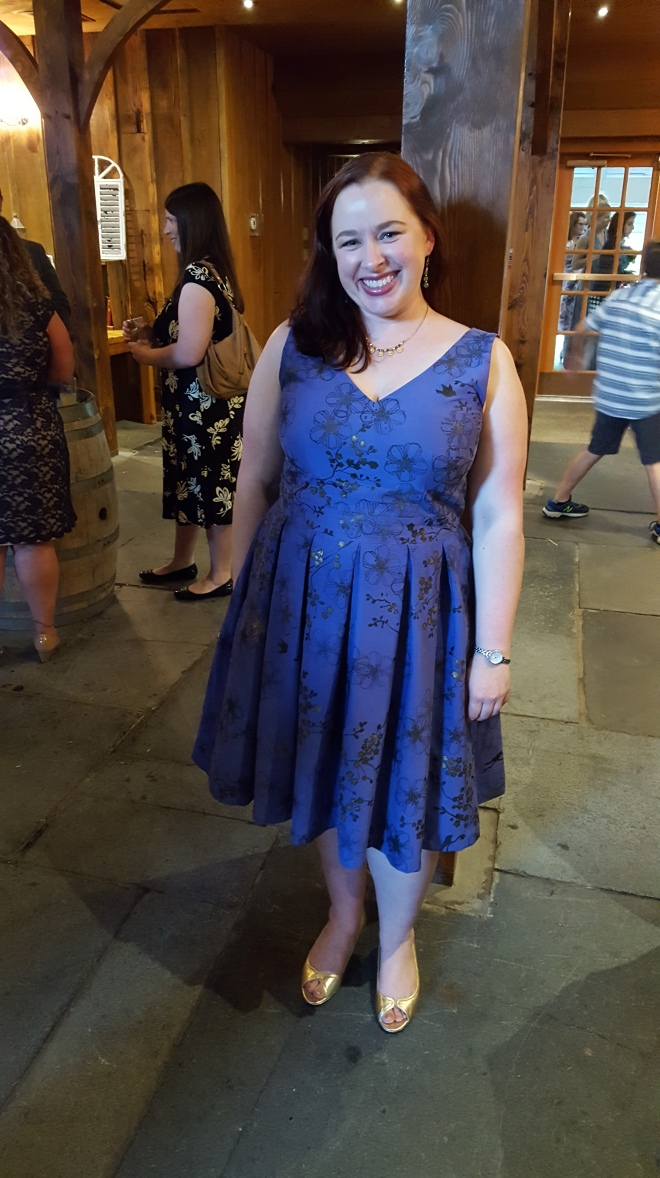
Anyway, here are photos and final thoughts on my Night Blooming Garden Dress from the Cashmerette Upton dress pattern.
20160911_163230

Another shot of my birthday/party dress. Not the best angle, I didn’t have time to do my hair before the wedding what with all the running around to help out, and there are some fit issues apparent, but all in all, I felt great in my dress.


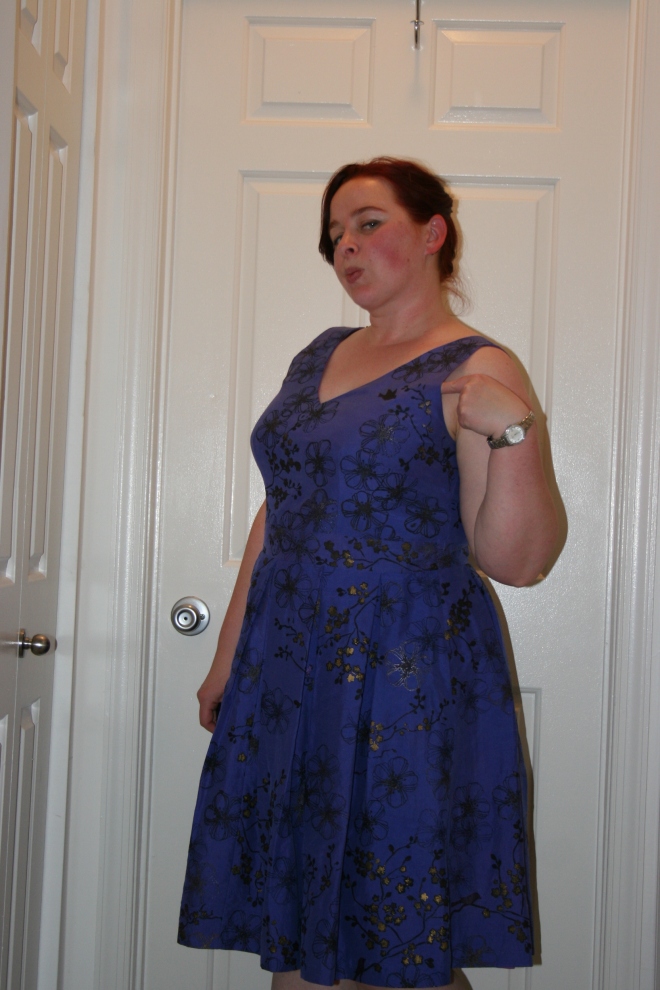
Now to the fit problems–they’re minor, but they exist, and I want to fix them for the next versions. First: there’s some gaping/bubbling at the front armscye. Definitely visible in the photo above. I think it’s due to the shape of the shoulder strap’s seam. It’s a bit V shaped, probably to accommodate those who are a bit fleshier in the shoulder than I am. Easy fix: just level out that seam.
IMG_8361

Armscye gap is gappy.


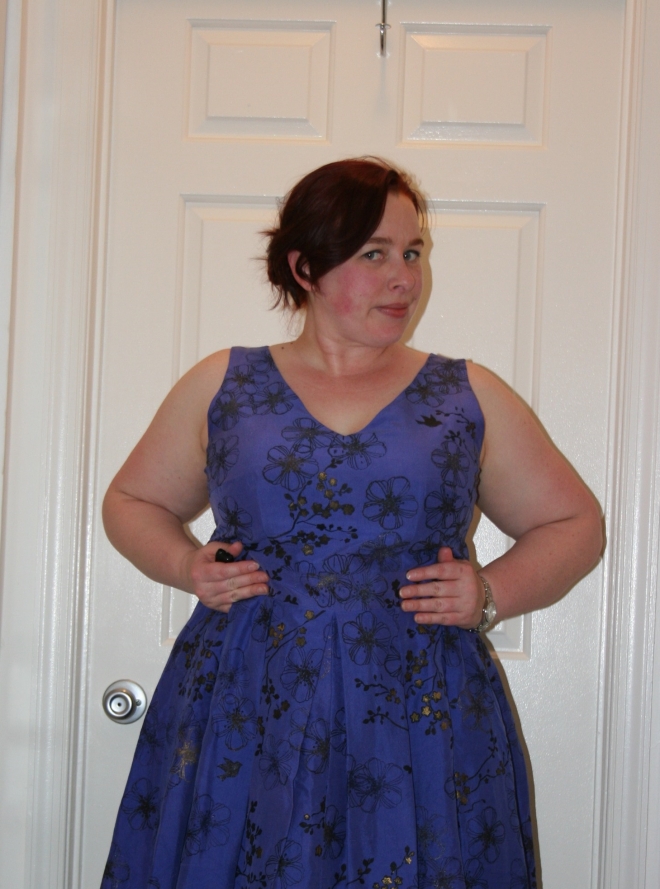
Second: It was probably a mistake to do no length adjustment through the torso. It’s not bad as-is, but it would be better if it sat a tad higher. I wanted it to sit at my natural waist, and it’s very close, but since my back waist is higher than the front (thank you, high/full hips), shaving off 1/4 inch to 3/8 inch from the bodice’s waist seam will likely be a better fit while keeping the waistband at my actual waist. The pattern is designed for this to sit a bit higher than the waist.
IMG_8365

Squishing the waist upwards a bit. Yeah, I like this better.


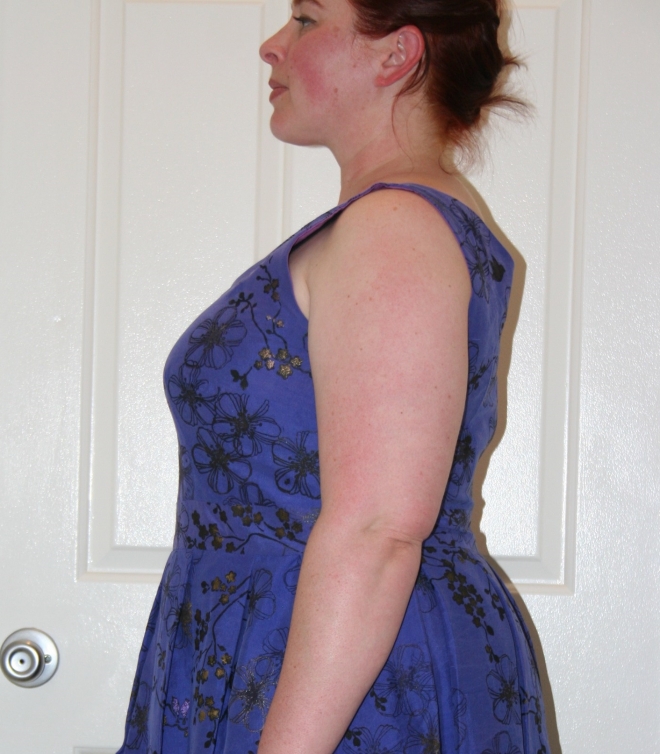
And I think fixing the bodice length will also fix the bit of bubbling at the center mid-back that I’m getting, too. You can see it where the zipper bubbles out a bit. Without my high hip pressing up on that back waistband, this will probably hang more smoothly.
IMG_8402

Just a bit bubbly at mid-back.


If I ever end up wearing this to another fancy event, I’ll probably wear a torso shaper thing under it, because once food hits my belly–out it goes! A little control never hurts. I am a firm believer in the benefits of shapewear. Not every day, or for every occasion, but sometimes.

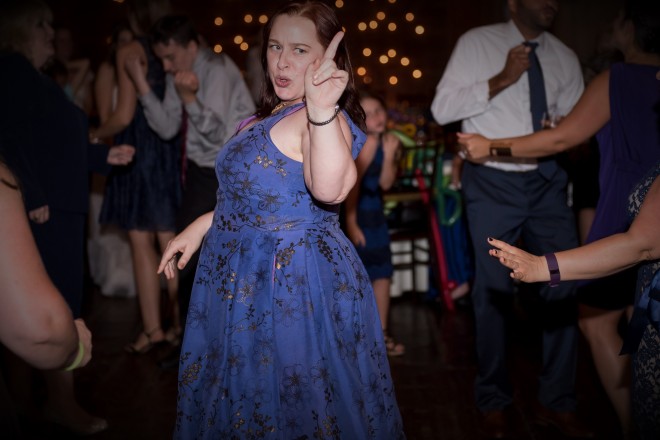
It was so much fun wearing this dress to dance all night to a killer playlist in a beautiful venue with so many wonderful friends and acquaintances (and strangers)!
0921-copy

No, no–I’m not angry–just killin’ it on the dance floor with everyone else. Admire my dress, dancing peons! Too bad I don’t remember what song was playing. Photo by Kelsey Christian.


I love how the dress’s skirt swishes!
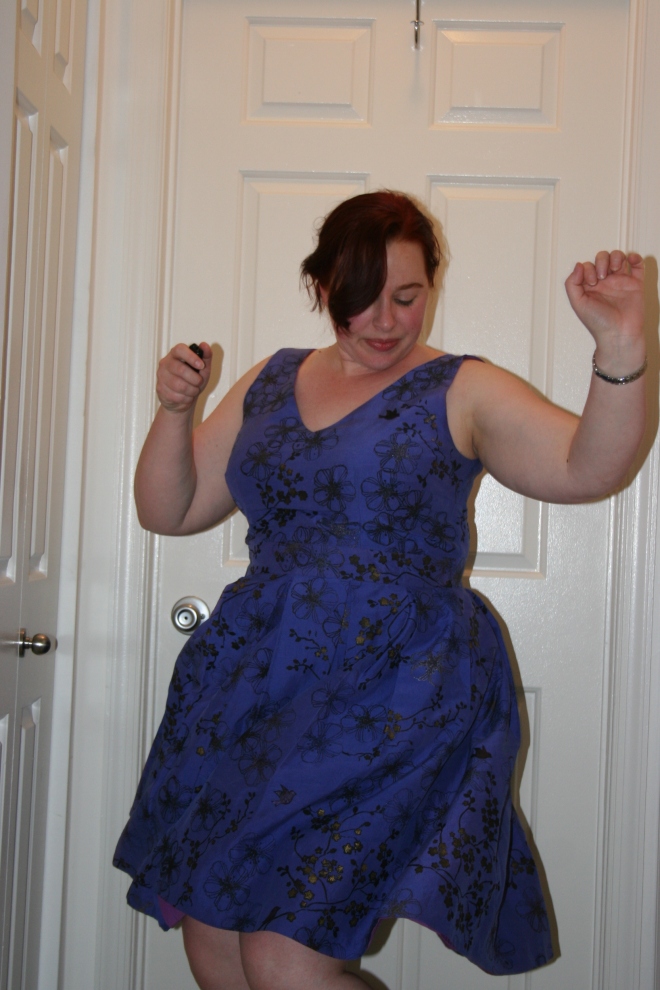
IMG_8379

Swisha-swisha-swisha!


Now, about this whole washing silk thing. It is totally possible, totally safe (presuming you’ve prepared your fabric correctly before sewing the garment–always pre-wash/clean the way you intend to clean the garment), and totally easy. Large mesh laundry bag. Gentle cycle. Cold water to prevent releasing any dyes. Baby shampoo. Yes, baby shampoo. Silk is protein, like hair. Baby shampoo is very gentle and doesn’t contain a lot of extra gunk that’ll mess up the fabric. Plus it smells really nice when it comes out of the wash. Better than a baby, even. You could substitute a textile detergent like Synthrapol, but that stuff smells chemically. Or use Woolite or something similar. But I stick with baby shampoo. Then just hang or lay flat to dry and press with a hot iron on a steam setting. Good as new!

I treat ALL of my silks this way: habotai, charmeuse, dupioni (unless the shimmer and crispness is really important for the project), shantung. *I probably wouldn’t treat silk taffeta like this, however, because it would ruin the finish, reduce the crisp hand and the fabric’s sheen, and probably soften it to the point that you’d no longer hear the ‘scroop’ sound as it moves.*

Anyway, thanks for looking and reading!
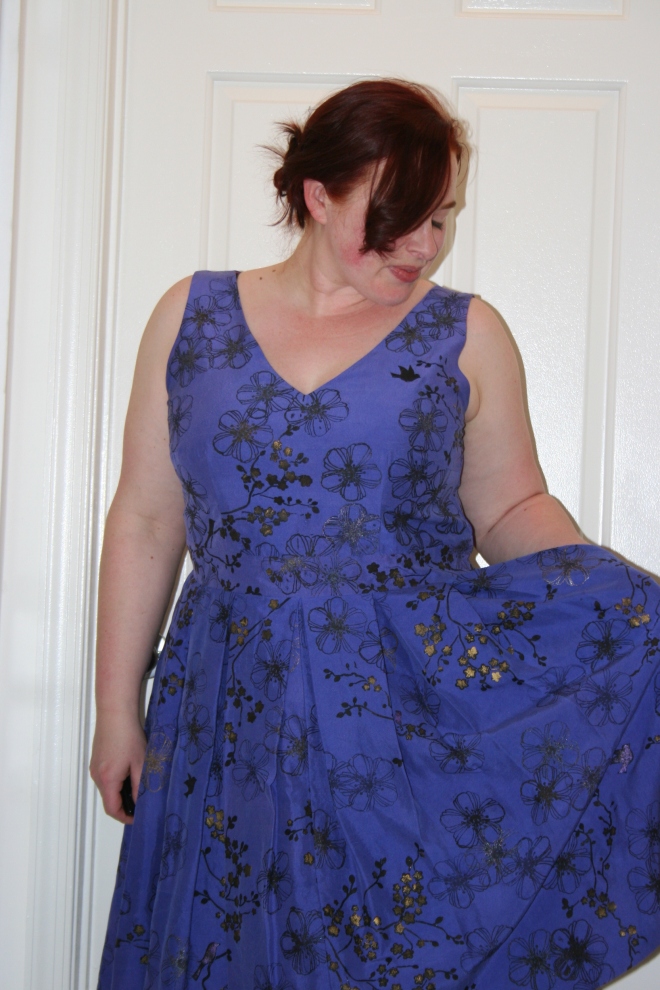
IMG_8394

Night-blooming Garden Dress

My Upton dress party dress project is thisclose to finished! I installed the zipper and finished the back seams last night. All that’s left is two hems, hand stitching the lining’s waistline down, and adding a hook and eye to the top of the zipper opening. Here’s a preview of the finished dress, which I’ve dubbed the Night-blooming Garden Dress.

14291834_10153775623485906_7365351501214404731_n

The color rendering in my sewing room is strange because the walls are lime-juice green.

Upton Dress muslin

Considering that most of my major pattern changes are already incorporated into the draft, I shouldn’t be so surprised that only one muslin for the Cashmerette Upton dress bodice was necessary. I made a few small tweaks to muslin #1, but nothing that required a fresh mock-up.

Before sewing up the bodice muslin, I made a few size modifications to the pattern at the side seams, grading out from a 14 at the shoulders and bust to a 16 at the upper waist. Initially, based on the pattern measurements compared to my own, I used the size 16 for the back waistband, but for the front waistband I graded out from a 16 where it joins the bodice to a 20 where it joins the skirt, because I’ve got some tummy that I wasn’t sure the size 18 would fully accommodate. But I saw immediately that all this excess needed to come right back out when I put the bodice on and zipped it up. I pinned the excess at the waistband and it turned out to shrink it back down to a straight 16. Even with a more snug fit through the waistband, it felt comfortable when I sat; if you have any fleshy bits in your torso you know sitting causes that flesh to expand. So I ended up using a straight 16 waistband. There’s just enough ease for comfort.

The short, torpedo-shaped waist dart with its curved legs was problematic for me because my bust is set very high and its fullness is evenly distributed from top to bottom. This waist dart shape nicely scoops in the bodice at the torso under the bust, but it ends too abruptly for my shape. This would probably work best for someone whose bust is low-set and is fuller on the lower half. For my shape, I needed to extend the dart and create a more gradual taper toward the point, while retaining the arced dart leg shapes. Below you can see the original waist dart shape (the shortest one) and the two extended versions I tried before deciding on the tallest one. Yes, that puts the dart point very close to my actual bust point, but for a garment with minimal ease, that works ok.

20160819_110915

When I made the Appleton knit wrap dress, I didn’t do any length adjustments, and the dress’s waist hit me just above my natural waist, which was perfect. It was pretty much the same for this pattern. Jenny, the pattern designer, described Upton’s lengthwise fit as “the top edge of the waistband sits at the high waist.” The dress may be designed to be a tad short-waisted on a person with an average torso length, to rest above tummy fluff. My torso is short and my waist is pretty clearly defined, even with my fluff. I wanted the waistband to rest closer to my natural waist, which it did without lengthening the pattern anywhere. However, I did need to add about 1/4 inch length to the front bodice waist to make the waistline level, because mine dips a bit in front, while it tilts up in back. The pattern’s included swayback alteration was still a teensy bit too long for me, so I took it up an additional 1/4 inch at center-back, tapering it to nothing at the side seams.

One other area of fit concern was across my shoulder blades. I have a very erect posture (thank you scoliosis, childhood horse riding lessons, and yoga), and many bodices bag out at my upper back. Even though I’m using the V-neck back bodice sections for this dress, I needed to take a bit of volume out of the upper shoulder and center-back areas. I took a few tiny darts out of the back neckline to remove some of that bagginess. I’ll have to do this to the scoop-neck version, too.

All in all, this was an extremely easy dress bodice to fit! The built-in customized cup sizes, swayback alteration, and shortened torso made getting the fit right faster than any other bodice I’ve fitted.

I’ve cut all the dress sections from fabric, and now I’m working on printing them. More on that later!

Dress Decision 2016

After polling all my coworkers, some key friends, and the fine folks following me on this blog and over at Instagram (@stephani.miller), I have decided on the design I will sew for my friend’s afternoon, outdoor/barn, September wedding. *trumpetssound*

Here’s the winner:

UptonVNeck-purple

The indigo (I’ve decided it’s indigo, not royal or cornflower; maybe I’m wrong) silk shantung in the Cashmerette Upton dress, pleated skirt with V neck, not the scoop neck I was originally thinking of. A coworker pointed out to me that scoop necks seem a bit more casual, and I would usually choose the V neck anyway. But for the other Upton dresses that are to come, I will most likely make the scoop neck version.

Anyway, I’m going to use the shattered lace printing effect that I love so much, so I’ll try to blog about that process here. I’m expecting the Jacquard Lumiere and Textile Paints I ordered to arrive early next week. I love Jacquard’s textile paints and dyes! They’re so easy to use. I’ve selected some lace scraps and will try out the printing process on other fabric scraps once the paints arrive to make sure I like the effect.

To print the shantung for the dress, I plan to either outline the pattern shapes on the fabric first, or just go ahead and cut the fabric before printing so I don’t waste paint and can be more strategic in the print placement and composition.

The fabric may get a vinegar/water bath before printing just to super-extra-fix the dye job.

Time to clean off my dining room table so I can use it for the printing! But even before that, I need to muslin the Upton’s bodice to make sure of my size and any adjustments.

What to make for a friend’s wedding??

What to make for a friend’s wedding??

I just realized it’s August. Funny how that happens. The months roll by, you think you have enough time for all the projects on your plate, and BOOM! It’s all gone.

This finally hit me today because in just a bit over a month, a friend of mine is getting married and I can’t decide what to make to wear. I’ve got a 2-year-old UFO that’s all underlined and pleated and ready to be sewn together that I could finish. The fabric is a beautiful mulberry-colored metallic jacquard I picked up from the Haberman Fabrics booth at American Sewing Expo three or four years ago. The pattern is from an issue of BurdaStyle magazine from 2011. I still love the fabric, I still love the dress, and as it’s ready for assembly it would be easy to finish. But I’m not sure it hits the right note for an early September wedding and reception in a rustic barn in Connecticut at 3 p.m.

I could change plans pretty easily at this point and instead make the Cashmerette Upton dress with the full pleated skirt option. If past experience with Cashmerette’s patterns carries through to this one, most of my pattern alterations are already included in the pattern’s draft. I’d have to do a muslin, of course, and I’d have to pick a fabric. I have lots in my stash to choose from, but half my stash is now at my parents’ house 8 hours away, as I’m prepping for a move. What I do have on-hand is mostly casual, or intended for historical costume, or fancier but not enough yardage.

Here’s what I have that could make a just-fancy-enough-but-not-too-fancy Upton for my friend’s wedding:

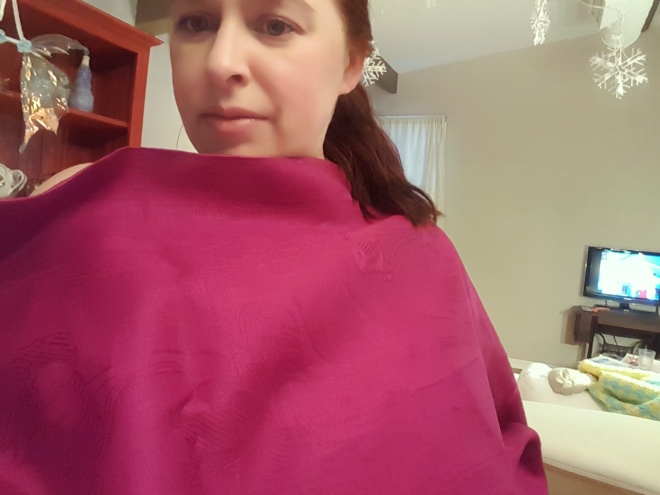
A beautiful fuchsia jacquard-weave linen, which I’ve already planned to make into this dress anyway. I’ve got a solid 4 yards of this. The color looks a little hot in this photo, but it’s not far off the real color. There’s a large Art Nouveau-ish design woven into the fabric, and the linen has a beautiful hand, stiff body, and full drape, plus that lovely linen luminescence. I’d wash this by dunking it a few times in warm water and letting it air dry before pressing to preserve some of its crispness and the fiber’s natural glow.

20160802_200912

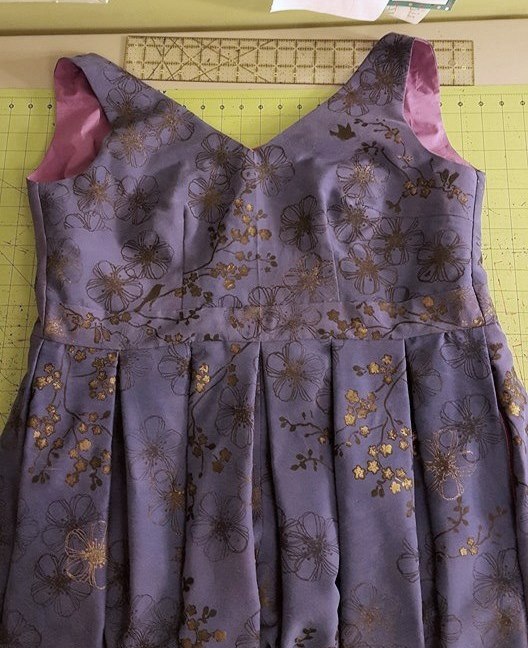
A silk shantung that started out periwinkle, but which I dyed to what I’ll call royal purple. Or maybe cornflower. It came out a tad splotchy in areas, but one more spin through the wash cleared most of that up. Still, the subtle sheen of shantung was diminished by the hot dye bath and washing it afterward. It definitely has a sand-washed appearance now. I have 3 yards of this 59-inch-wide fabric, which should be JUST enough for an Upton dress. I’d like to try a bit of painting on this one to disguise any remaining splotches, with black and gold paints. It would be semi-fancy, original, and just challenging and creative enough to keep my attention on it.

20160802_192517

Then there’s the 7+ yards of rose-gold silk dupioni that I bought for a Regency gown, but then decided it would be too stiff even after washing. It is very highly slubbed and medium weight. It would probably look great after a gentle wash with baby shampoo. Despite the texture and pretty color and nice sheen, it would be a rather plain dress. So I’d probably do some painting on it to give the dress more interest.

20160802_191641

What do you do when you’re faced with several good options and can’t decide which would be best? If there wasn’t a deadline involved I’d say: I’ll make them all and it doesn’t matter which one comes first. But since this is sewing for a goal, a dress to wear to a friend’s wedding, deciding is kind of important.

Here’s what I do when I can’t decide: sketch. I either free-hand draw the design, then color it in to get the full effect, or I use the pattern flats. Since the Upton is a very simple design and the flats are already nicely proportioned for my kind of figure, I decided to use them as the basis for my sketches.

Here’s option 1, from the linen jacquard:

Sketch 3-A

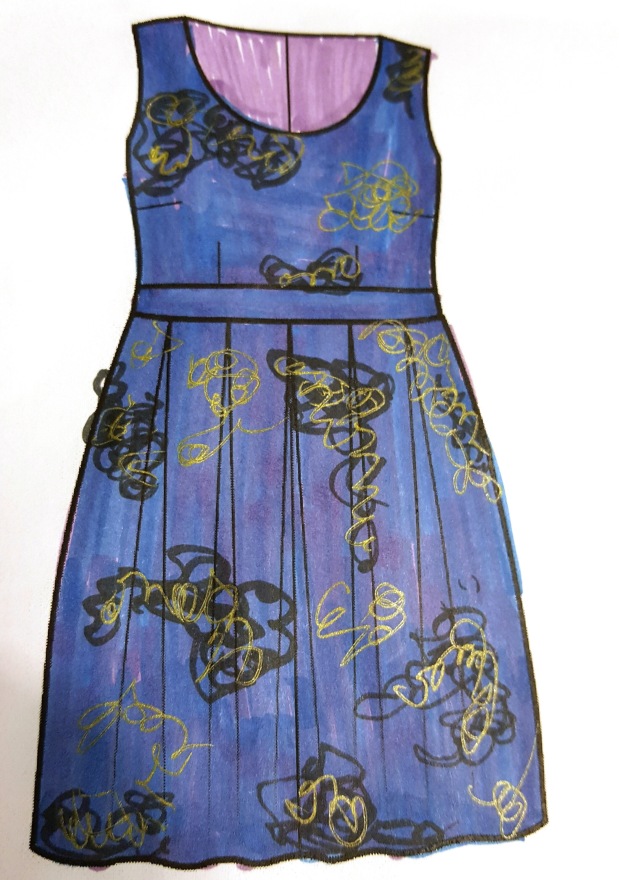
Here’s option 2, from the royal/cornflower shantung. I would apply a painted design that I call “shattered lace,” which is done by dabbing fabric paint or spraying liquid dye onto the fabric through scraps of lace. I love this technique because it’s so interesting. I’d use black and gold and scatter the patterns around the fabric randomly.

Sketch 1

And option 3, which is hard to get an accurate sketch for because the color is hard to reproduce with marker (I did some color saturation adjustment). For this option, I’d also apply a shattered lace effect, but in gold and bronze color paints, and probably only concentrated around the dress’s hemline. I tried to mimic the dupioni texture with metallic gold pen, but the color adjustment reduced its effect.

Sketch 2-ab copy

I really like all of these options, and making a decision is going to be tough. All the colors would look good with my complexion, I think. The linen is a fancy fabric, despite being made from a humble fiber, and it’s in one of my favorite colors. And it would require no additional embellishment.

The royal/cornflower shantung offers a real creative opportunity and could be a very unique, beautiful dress.

But the rose-gold dupioni also offers creativity, although it would be a more subtle paint-job. And the fabric is a bit fancier because of its sheen, maybe too fancy for the wedding time.

I’m leaning towards the royal/cornflower shantung, because I like to make things hard on myself, apparently. But it wouldn’t take much time to accomplish the painting. However, I have a lot of projects on my plate at the moment: I’m helping another friend with her wedding dress (for October), I’m supposed to be whipping up my fitting muslin for the Chanel jacket to contribute to a project at work (in September), and I’m trying to get some blouses made AND pack my belongings.

What would you do? Which would you wear to a 3 p.m. early September (read: potentially hot) wedding in a barn?

I know there aren’t a lot of followers of this blog out there, and it’s not often I ask for opinions because I usually have pretty firm ones of my own–but if you would like to share yours, please do! Help me out, folks!

Recent Projects: ’20s evening frock

My '20s evening frock--not the best silhouette on a curvy figure, but oh so fun.

I made this costume on the fly for a friend’s ’20s-themed birthday party—and I have to say, it turned out pretty well, considering the tunic-style outer dress started life as a shawl purchased from TJ Maxx!

I’d been researching ’20s-style evening gowns for several weeks, wondering how I could whip one up in a short amount of time but still have it be something I’d love. Flapper styles aren’t exactly ideal for my figure, but I love to get into the spirit of costume parties and themes. And I do love how opulent the embroidery, bead, or sequin detailing can be on a ’20s dress. So I decided to stick with something simple that I didn’t have to do much cutting for and could easily jazz up with a few trims and embellishments.

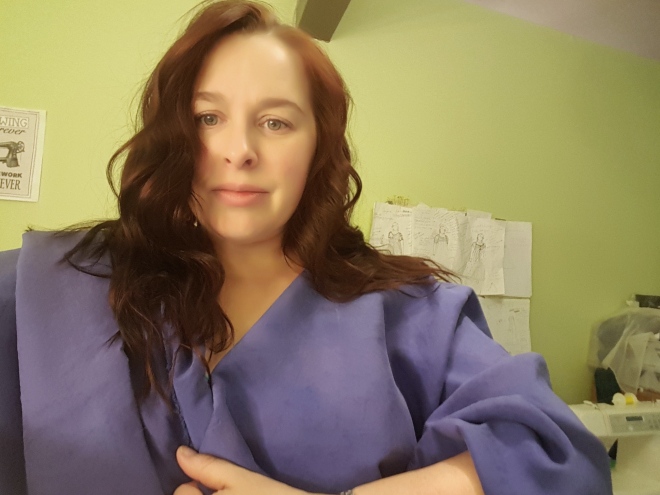
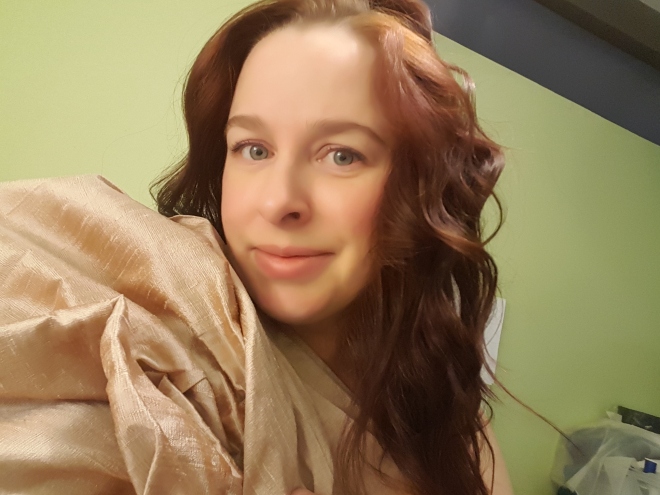
I found a vaguely Persian-patterned shawl at TJ Maxx, and loved the colors. And it already had some sequins applied to accent parts of the pattern. Pink sequins! So fun! I just needed a slip to go underneath, as the shawl was of a fairly loose, gauzey weave.

I thought gold would go well underneath the shawl’s primarily navy and golden-olive palette, and found a butterscotch-gold poly crepe-back satin fabric to use.

I only used a pattern for the underslip. A while back I inherited a few original 1920s sewing patterns from my grandmother and held onto them, thinking I might use one at some point. One of the patterns was for a pieced princess slip or slipdress, by Designer Pattern. And since my grandmother was not a small woman even when she was young, the pattern was actually close to my size! I didn’t bother copying the pattern pieces, just used a dry iron to smooth out the wrinkles and laid them atop the fabric for the slip. No pins.

To make the outer dress, I simply folded the shawl in half length-wise and draped it over my dress form, cutting a hole in the fold for the neck. Then I snipped four Vs: one for the front neckline, a lower back neckline, and along the side edges to form the underarm lines. I stay-stitched all the raw edges before the gauzey weave had a chance to unravel, stitched down the sides of the shawl to form sideseams, leaving the bottom few inches open as hem slits. Then I stitched on the organza shoulder straps and handstitched the new pink sequins in place around the neckline and arm openings. I left the bottom hem raw, as the original shawl ends in a fine, short fringe. 

But the accents and accessories are frequently what makes ’20s evening dresses so appealing—fun, flirty, glittering, and sophisticated. To my supplies I added four iron-on beaded/sequined medallions to accent the shoulder straps where they would join the body of the dress. More pink sequins to outline the neckline and arm openings, sage green organza ribbon to use as straps, a pink and gold organza flower pin, and a narrow, gold net beaded-and-fringed scarf to use as a low sash.

Iridescent pink sequins already embellished the design of the purchased shawl; I added regular pink sequins in nearly the same color at the neckline and arm openings. A double thickness of organza ribbon forms the straps, and the ends are covered with iron-on beaded medallions.

After ironing on the bead/sequin medallions to cover the raw organza ribbon edges at the shoulder/bodice join, I tried on the outer dress. A few tweaks later and it was ready for finishing. I marked the placement for the gold net/bead sash, tacked it into place, and then crossed the ends on the left side of the dress, slightly towards the front. Last step: pin the flower into place where the sash ends cross. 

The gold net beaded/fringed sash and pink-and-gold net flower pin.

It’s certainly a unique and crafty ’20s evening dress, but the effect was fantastic, especially with the bright butterscotch gleaming through the gauzey shawl material. I’m quite proud of it. It took me most of a weekend to complete. It wore very nicely, although some of the beads on the sash fringe fell off. I was able to dance the Charleston quite easily!

I would love to make a few more authentic ’20s dresses at some point from some period dress-draping books in my Amazon wishlist, but I’ll be keeping this one.

Dancing away to something resembling the Charleston!